How to make your clothing last longer (and do your bit for the environment)
At TOG24, the Great British countryside is close to our hearts. We craft our clothing so that you can enjoy adventuring in the outdoors across the UK, and further afield, comfortable in the knowledge that your clothes and kit will perform in just the way you want them to.
But that passion also extends to doing our bit to look after the world in which we live. With the UK currently the fourth biggest textile waster in Europe, we all need to do what we can to improve things now and for future generations. An average Briton will throw away over 3kg of clothing each year, the majority of which will end up in landfill or an incinerator. Not only is this environmentally damaging but expensive as well, with the average person in the UK spending nearly one thousand pounds per year on new clothing.
At TOG24, we’re continually reviewing the materials we use and the methods we employ to ensure we lessen the social and environmental impact of the clothes we make. We’re also big fans of the mantra: “If it ain’t broke, don’t fix it”. And if it is broken? Well, sometimes a fix can make it just as good as new.
Part of our drive to create a more sustainable world is to encourage breathing life into old clothes. Every outdoor adventurer should know how to fix their kit, but it’s also essential to reduce our waste. So, next time you spot a hole, a tear, or a stain give your older kit a little bit of love and bring it back with our handy tips. We’ve taken your most frequently asked repair questions and given our expert advice. So, go on show your kit the love it deserves.
How do you fix a tear in a down jacket?
- It is generally not a good idea to try and sew up a rip or a tear in a down jacket, as most down jackets use lightweight face fabrics and you will need a very fine needle and thread to do the job, even tiny needle holes can cause down leakage.
- Adhesive Patches are an option that follows a simple method to repair without the need for glue or heat-sealing.We offer adhesive repair patches for down jackets – please contact TOG24 customer service on 01924 601011
- If you believe the tear or hole is too severe for you to fix yourself, then then we recommend contacting TOG24 customer service on 01924 601011. An alternative option is contacting a specialist repair service, we recommend our friends at Lancashire Sports Repairs who will be able to fix severe tears that you might not be able to with the above methods. However, with both these methods, there could a larger cost than fixing the jacket yourself.
How to wash and dry a down jacket?
- Remove any loose dirt on the down jacket using a brush and make sure that all zips and Velcro sections are closed.
- Make sure that the detergent compartment of your washing machine is completely clean as specialist cleaners need to be used. This can be achieved by running your machine empty on a hot wash to clear and residue.
- Make sure when washing the down jacket that the washing machine is on a delicate setting e.g. wool or delicate cycle on a cold wash. We also recommend turning the jacket inside out if possible, to avoid damage, along with not using a top-loading washing machine.

- Pour a down jacket specific cleaner into your washing machine detergent compartment. We would always recommend using a specialised cleaner as household softeners etc. can cause the down to be damaged and strip the water-resistant coating off the jacket – if there is one.
- When drying the down jacket, we do not recommend air drying as not only will this take a significant amount of time it can cause the down within the jacket to clump together. We always recommend tumble drying the jacket at a low heat as this avoids melting of the outer shell of the jacket along with the seams. Remember to always check the label on the garment for specific details as some jackets will vary slightly.
- Another pro tip when drying a down jacket is using a dryer ball as this can help to re-fluff the jacket and stop clumping of the down. It is also worth taking the jacket out of the dryer now and then, holding it flat and fluffing it.
How to fluff up a down jacket?
- The best way to fluff up a down jacket is by using a tumble dryer. We recommend using a low and delicate setting on the dryer and putting the down jacket in the dryer on its own. You can also remove any water from the jacket where possible by gently massaging it, do not ring it out as this will damage the down.

- A pro tip to help the down jacket fluff up while in the tumble dryer is by adding in dryer balls, which will help to separate any clumps of down as the balls bounce around the dryer, whilst also removing some water from the jacket.

- Rather than letting the dryer run for its full cycle, we advise taking the jacket out of the dryer every 30 minutes, shaking it and massaging any clumps of down to ensure that all the down dries evenly and
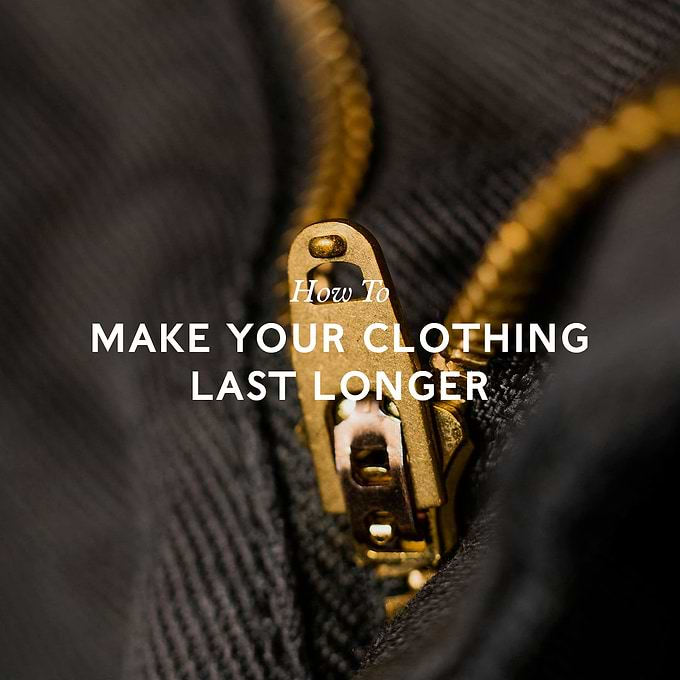
How to fix a broken zipper?
When it Separates After Fastening
- Usually, the issue here is the slider rather than the teeth as it has loosed and doesn’t bind the teeth together in place.
- While the slider is still attached to the garment, use your pliers to squeeze the top and bottom plate together to help restore the slider to its original shape. Check that the gap between the two places (where the teeth live) is getting smaller.
- Don’t press too hard at once in case it breaks the slider. We recommend doing this gradually and checking every now and again, so the zipper doesn’t break.
When the Slider comes off the track of teeth
- If one or both sides of the slider come off the teeth then we advise reattaching the slider. You first need to find the bottom of the zip, on a piece of clothing this is easy as it’s the closest section to the floor. If not look for the end with the tab of fabric after the zip finishes.
When the Zip Is Stuck
- The zip can often get stuck if there is some fabric caught in it, we recommend checking for any fabric or fibres that may be stuck before any steps are followed as often removing these can help the zip become unstuck.
- However, if you can’t remove them with your hand we advise contacting TOG24 customer services on 01924 601011
When the Zip will not stay up
- Again, check for any fabric or loose fibres that might be blocking the zip
- If your zip won’t stay up then it often means the teeth are either dislodged or have worn away. You will need to contact TOG24 customer services on 01924 601011
How do you clean and dry walking boots?
Footwear Care with TOG24 x Grangers from TOG24 on Vimeo.
- If you are on the go and mud has got stuck on the sole of your shoe, then you may have less grip which can cause several issues. One of the easiest ways to address this while your out and about is by splashing the boot through a puddle to loosen the dirt and then wipe them through some wet grass. Although not ideal, it’s a low effort solution if you are on the go and need to remove some of the dirt from the bottom of your boot.

- For the outside of the boot, we recommend using a medium-stiffness brush combined with warm water to remove any dirt which can’t be removed through the above method. We also do not advise using detergents on the boots as it can damage the material in some cases. It is also worth noting that if you are using something sharp be careful as not to again damage the material. You may want to remove the laces and insoles and wash them separately if needed so you can get to the hard-to-reach places on the outside of the boot and so they don’t get wet when washing the inside of the boot.
- If you are struggling to remove some dirt, we would recommend either using a specialist cleaning product or a small amount of washing up liquid to help the removal.
- When drying the walking boot, we don’t recommend drying them on a radiator, particularly if they are a leather walking boot as this can crack the leather. We instead advise drying them naturally through both air drying and using something such as newspaper (stuffed inside the boot) to absorb any additional moisture, this will also keep the shape of the boot correct.
- When cleaning the inside of your walking boots we recommend filling them with lukewarm water, leaving this overnight or for 12 hours and then simply pouring the water away and drying as per our previous method. We advise doing this every now and then as sweat can build up in the boot and cause an odour due to the waterproofing of the boots.

- If your walking boots are waterproof you will sometimes have to reproof them to keep the waterproof performance up, as it will slowly wear away over time. For this you will need a specialist boot proofer and apply it to the walking boot, focusing on the areas around the stitching, after you have cleaned the boot entirely. Once the proofer has been applied wipe the boot down with a clean dry cloth to remove any access and leave to dry as you normally would.
How to Fix a Collar on a T-Shirt
- You will need the following to help fix the neckline of your t-shirt: A bowl of ice cubes in water, an iron, a flat surface e.g. a table.
- The first thing you need to do is fold the neckline of a t-shirt into a wave-like pattern:

- You then need to take the collar of the t-shirt and dunk it into the bowl of ice water for several seconds, making sure to keep the folds shown above in place. Dunking the cotton t-shirt collar in the ice water will help stiffen the cotton fibres.

- Once you have dunked the collar in the ice water, you need to take it out and squeeze all of the excess water out of the collar whilst maintaining the folds (shown above) in place.

- Once you have removed any excess water we recommend laying the t-shirt out on a flat surface and moving your fingers vertically from the bottom to smooth out the lines of the collar. Whilst keeping the t-shirt on the flat surface you then need to iron the collar to flatten it further, by ironing in an upwards direction. However don’t iron it until completely dry, you should let it dry on the flat surface completely.
How to Fix a Hole in a T-Shirt?
How to Sew the Hole
- Make sure to get a thread that either matches the t-shirt you are repairing or a clear thread so that your work is not noticeable. We recommend taking your t-shirt with you when you go to find the thread so you can compare the colour and always use a matte finish thread. If you cannot find an exact match, then use a slightly darker thread rather than lighter as it will blend in better.
- You then need to cut off a long piece of the thread, around 24 inches long should be enough but potentially longer depending on the hole you have. When choosing a needle we recommend checking what gauge you will need, larger gauges e.g. 16 are very thin and better for delicate fabrics.
- When sewing the hole, we advise starting on the inside of your shirt, poking the needle through the fabric around 2 inches above the hole so that the stitch stays in place. You will then push the needle through the hole and back up through the fabric keeping it close to the previous stitch as this will secure the thread holding the hole together when you are done.
- When sewing the hole, you need to start towards the top and to the right of the hole, then alternate between the left and the right as you go along so that the hole will eventually pull together in place, however, try and keep them close together when stitching, as mentioned previously. Remember, after each stitch keep pulling the needle up until the thread is tight. Only stop sewing once you reach the bottom point of the hole and it’s completely sewn together.
- Once the two sides are threaded together make sure to bring the needle inside the shirt and tie several knots in the thread, this will keep the stitching in place. Make sure that you tie multiple knots and keep them close to the hole so that no excess thread is left. Once you have done this cut off any excess thread close to the knot.
How to Patch the Hole with Fabric
- As was the case with the sewing option you will need to find some fabric that matches the colour of the t-shirt or if it has a pattern look for one that will blend in well. We also recommend finding a piece of fabric that is a similar material to the t-shirt you are fixing as you want it to feel similar to the t-shirt. If you are looking for an exact match and your t-shirt has a pocket then the inside of the pocket is a good option, however, you would then need to patch this afterwards.
- Once you have the fabric make sure to cut a piece out that is slightly bigger than the hole you are fixing e.g., around half an inch bigger on all sides. You can achieve this by either measuring with a ruler or outlining the patch on the fabric with a pencil and then cut out with scissors.
- You then need to cut out a piece of fusible bonding web, which is used to help the patch of fabric to stick on the inside of your t-shit. Follow the same method as above to find the size of the fusible bonding web and cut it out with a pair of scissors. Once you have cut out the general shape, we need to cut out the middle of the fusible bonding web as we only need it where the fabric touches the t-shirt rather than in the hole itself. You can do this by placing the bonding web over the hole and trace around it with a pencil to see which section should be removed.
- Once you have these sections ready you need to turn the t-shirt inside out and place the bonding web over the hole, and then the fabric over the top of this. Make sure the bonding web cannot be seen through the hole.
- You then need to iron the fabric and bonding web into your t-shirt, we recommend not ironing back and forth as you would usually but instead holding the iron on the patch for around 10 seconds, this timing could vary depending on the instructions that came with your bonding web. In terms of iron heat settings, we advise a slightly higher heat than you would usually use for the fabric.
Embroidery & Patterns
- If you have a shirt that has several holes or you don’t want to sew it in the usual way then a creative fix through embroidery is an alternative. You can get creative with this making sure that the hole is covered through embroidering an object onto the t-shirt, for example, a heart, which then becomes a focal point of the t-shirt.
- You can also investigate adding a decorative patch onto the t-shirt using the above method but choosing a fabric that does not match the colour of the t-shirt.
How do you Remove Stains from T-Shirts?
How to Remove Deodorant and Sweat Stains from T-Shirts
- For the below method, we recommend applying the solution stated and letting the clothes sit for at least one hour before washing them in hot water. If you have already washed the clothes since the stain took place then it can be harder to remove the stain as the proteins can set.
- You can try and remove the stain with a mixture of kitchen salt and boiled water, around a litre of water for every four tablespoons of salt should do the trick. You would then again need to scrub the stain with the solution until you see signs of it disappearing.
How to Remove Grease Stains from T-Shirts
- One thing to note with grease stains is that applying a sprinkle of either salt or artificial sweetener on the stain can stop it from setting, making it easier to remove afterwards. Apply the salt and then brush it off the stain after several minutes.
- Once you start to clean the stain properly we recommend using a grease-cutting washing up liquid. Apply some of the soap to the stain and then rinse it with warm water.
- When it is time to wash the garment in a washing machine we advise rubbing some liquid laundry detergent into the stain or if you have available use a specialist pre-treater to the stain. Once applied we recommend washing the t-shirt on the hottest setting that is safe, you can check the label for more information on this. Air-dry the garment and make sure that the stain is completely gone.
How to Remove Grass Stains from T-Shirts
- Detergent on its own is a good method of cleaning a grass stain out of clothing, we advise adding it to the stain, scrubbing it, letting it sit for 10 to 15 minutes and then rinsing with cool water.
How to Clean and Wash Suede Shoes?
Cleaning Dirt and Scuff Marks
- Suede shoes are very sensitive to water so when cleaning dirt or scuff marks off the suede we always recommend doing it dry.
- Once your shoes are dried, we advise using a specialist suede brush as suede has a soft grain and can be damaged when using other brushes. If the suede shoes have a care label you should always follow the advice of this label as it’s more tailored.
- We always recommend brushing gently to remove dirt. Use the specialist brush to lightly brush away dirt that has accumulated on your shoes. Do not go back and forth, we always advise brushing repeatedly in the same direction.
- In terms of scuff marks, we recommend brushing scuffed areas vigorously back and forth. This is because when you scuff your shoes, suede's grain can get pressed down in one direction. If the brush isn’t having the desired effect then you may need to use a knife to scrape the area, then proceed with the brush afterwards.
- If you have stubborn marks or scuffs on the shoe then using either a specialist suede eraser or a generic pencil eraser on the areas can help lift the mark.
Water Stains
- When looking to remove water stains, we recommend applying a small amount of water to the surface of the suede with your specialist suede brush. Although water can damage a shoe when applied lightly it can help to remove stains.
- Use a dry cloth or sponge to dab off the excess water on the shoe until the shoe is evenly wet without any visible water stains.
- As your shoes are probably still wet we advise filling them with paper – newspaper should work – as this will help soak up some of the excess moisture when drying, particularly on the inside of the shoe. The wads of paper will also help the shoe retain its original shape.
- Let the shoes air day overnight in a dry, well-ventilated spot and let the water evaporate.
- Once the shoe is dry then go over it with your specialist suede brush to help return the grain to its normal state.
Stubborn Stains
- If you have any stubborn or unknown stains on your suede shoes such as oil stains, it’s important to tread carefully. First use the usual method of scrubbing the stain with a suede brush, similar to how you would for a scuff and then use a nail brush combined with warm water on the stain. If the oil stain is fresh then an alternative is cornflour, which you need to sprinkle on the stain and leave overnight. You then proceed to brush away the flour and mist the stain with an iron.
- If you have any wet mud on your suede shoes then we recommend letting it dry before cleaning, wipe away excess mud without pushing too hard on the suede and leave it to dry overnight. In the morning break off the larger chunks of mud with your hands and use the suede brush for the rest.
- If you have wax or chewing gum stains then put them in the freezer for a few hours and it should make it easier to chip away at the large chunks and then finish with a suede brush.
- If you have bloodstains on your suede shoes then we advise using cotton and peroxide, dabbing the stain slowly until the blood comes out.
How to Get Rid of Bobbles on Wool Jumpers?
- If you have bobble or pilling on your wool jumper then there are several methods to get rid of it.
- The first method is either using a fabric comb or shaver to carefully remove the bobbles or piling.
- An alternative method is to use a sharp standard razor, a new disposable one would work best, make sure the material is taut and shave off any bobbles in the jumper. We’d then recommend using a lint roller or tape on the jumper to collect any cut-offs attached.
- If you’ve only got a small amount of pilling then you can use adhesive tape, lice comb or a Velcro hair roller to remove the pilling.
How to Remove Stains from a Wool Jumper?
General Tips
- Always blot any excess spills as soon as they happen using tissue paper or an absorbent towel or remove solid stains (e.g. dirt) using a blunt knife or spoon as you don’t want the stain to set.
- If possible, test out any treatment on an unseen area of the knitwear so that you can see for any appearance change e.g. colour loss of bleeding.
- Although some of the alternative methods that we have mentioned below can help, wool is very delicate so should be treated carefully and all labels should be checked before treatment and ideally getting a professional to remove the stain is ideal.
Alcohol Stains
- Detergent on its own is a good method of cleaning alcohol stains out of clothing, we advise adding it to the stain, scrubbing it, letting it sit for 10 to 15 minutes and then rinsing with cool water.
- An alternative is to use a stain remover and treat the stain prior to washing normally
Black Coffee
- Detergent on its own is a good method of cleaning coffee stains out of clothing, we advise adding it to the stain, scrubbing it, letting it sit for 10 to 15 minutes and then rinsing with cool water..
Blood
- A strong biological detergent on its own is a good method of cleaning blood stains out of clothing. Pre rinsing the garment in cold water is highly recommended as hot water encourages the blood to stick to the fibres of the garment.
Butter/Sauces & Grease
- Detergent on its own is a good method of grease stains out of clothing, we advise adding it to the stain, scrubbing it, letting it sit for 10 to 15 minutes and then rinsing with cool water then wash normally.
Chocolate & Tea/White Coffee
- Using a detergent, wash the item normally as per care label instructions
- Alternatively use washing up liquid, lather the stain gently and soak the garment for 30 minutes and wash normally
Egg & Milk
- Dab the stain with a small amount of biological detergent and leave for 30 minutes, then wash normally as per care label instructions. You may need to repeat this process.
Fruit & Red Wine
- It is advised to not let the stain dry, try to keep it moist with cold water and apply stain remover prior to washing normally
Grass
- Apply soap carefully, by using a mild tablet soap or flakes or dab gently with a cloth soaked in rubbing alcohol.
Ink
- Dab the stain with a microfibre cloth when wet to absorb as much of the ink as possible. Apply a laundry eraser to the stain then wash with a biological detergent at a low temperature
Lipstick & Make-Up
- Apply neat washing up liquid to the stain and leave for 10 minutes. Wipe stain gently with damp microfibre cloth to remove most of the makeup then wash garment normally.
How to wash thermals?
Wool Blend Thermals
- One method for washing wool blend thermals is by hand washing in warm water with a mild detergent. Once you have washed the garment make sure to rinse all of the detergent out and air-dry it on a flat surface.
- If you are looking to machine wash the thermal, we recommend using the delicate or wool setting on the machine combined with a mild detergent and a short cycle to avoid damaging the piece of clothing.
- You should then rinse with warm water and air-dry on a flat surface.
Polyester Thermals
- You can wash polyester in a washing machine with a mild or all-purpose detergent on a normal cycle with slightly warm or cool water.
- We advise air-drying the polyester as high heat can cause the garment to shrink over time. Please check the garment care label
Now even your old kit will give you a spring in your step as you set about adventuring and exploring the best that the UK has to offer in 2021 and beyond.